Friday, April 26, 2024

Playing in the Rain, Charming Sentiments and Unbounded Love


This is card number five using the same sheet of paper from the Fresh as a Daisy designer series paper pack. You get two sheets of each paper, so you can make ten of these cards and still have 10 beautiful 12x12 papers for scrapbooking or card making. This paper and sentiment on the outside is retiring this month, so if you want it make sure you get your order in soon. The sentiment on the inside will be available to purchase May 1, 2024.


Products:

Stamps: Playing in the Rain. Charming Sentiments (retiring end of this month) & Unbounded Love

Ink: Momento Tuxdo Black and Mossy Meadow

Stampin’ Blends: light & dark Old Olive, light & dark Mango Melody (retired color)

Paper: Old Olive  and Basic White card stock. Fresh as a Daisy designer series paper (retiring this month)

Accessories: Stamp Cut and Emboss machine, Playing in the Rain dies, mini Stampin’ Dimensionals, Tombo liquid glue or Stampin Seal, Paper Trimmer, Paper snips


Instructions:

1.    Cut a card base of Old Olive 5 ½” x 8 ½”, score at 4 ¼”.

2.    Attach to card base designer series paper panel shown trimmed down to 4 ¼” x 5” using Tombo glue or Stampin’ Seal.  

3.    Stamp sentiment from Charming sentiments using Mossy Meadow on card front.

4.    Stamp turtle from Playing in the Rain and color using Stampin’
Blends. (if you don’t have Mango Melody use dark Daffodil with light Pumpkin pie) Using Mini Stampin Dimensionals attach to card front.

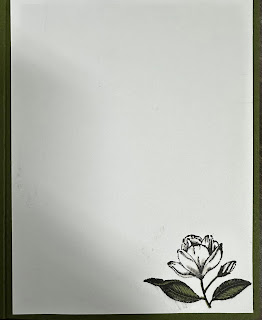
5.    Stamp sentiment from Unbounded Love using Mossy Meadow on Basic white panel cut at 4 ¼” x 5”. Stamp flowers from Playing in the Rain stamp set using Momento Black and color centers of flowers.

6.    Attach to inside of card.

7.    Stamp either Turtle or flowers on bottom left or back flap of envelope (it is not necessary to color, but if you do put a scrap of paper under as the ink does bleed.
Thursday, April 25, 2024

Fresh as a Daisy designer series card number four


This a very quick and easy card. Simply add cardstock, a sentiment and a few jewels and you have a beautiful card.

This is card number four using the same sheet of paper from the Fresh as a Daisy designer series paper pack. I have one more I will share tomorrow. You get two sheets of each paper, so you can make ten of these cards and still have 10 beautiful 12x12 papers for scrapbooking or card making. This paper is retiring this month, so if you want it make sure you get your order in soon.


Products:

Stamps: Cheerful Daisy

Ink: Azure Afternoon

Paper: Azure Afternoon, Copper Clay and Basic White card stock. Fresh as a Daisy designer series paper (retiring this month)

Accessories: Stamp Cut and Emboss machine, Cheerful Daisies dies, Adhesive backed solid gems, sponge daubers, mini Stampin’ Dimensionals, Tombo liquid glue or Stampin Seal, Paper Trimmer, Paper snips


Instructions:

1.    Cut a card base of Copper Clay 5 ½” x 8 ½”, score at 4 ¼”.

2.    Attach to card base an Azure Afternoon card stock panel of 3 3/4” x 5” using Tombo glue or Stampin’ Seal.  

3.    Trim down panel shown to 3 ½” x 4 ¾” and attach to card front. Save scrap for inside of card.

4.    Stamp sentiment from Cheerful Daisies stamp set on scrap of Basic White card stock with Azure Afternoon ink pad.

5.    Die cut sentiment using die from the Cheerful Daisies die set placing die as shown. Using your Paper Snips trim off excess. Sponge Azure Afternoon ink around edges using a sponge dauber and ink pad.

6.    Add one gem to sentiment panel and pop up using Stampin’ Dimensionals. Place two other gems on card front.

Inside:

1.    Cut Azure Afternoon to 4” x 5 ¼” and attach to inside of card base

2.    Cut Basic white 3 ¾” by 5”.

3.    Add remaining strip of designer series paper

4.    Stamp sentiment if desired.

5.    Glue to inside Azure Afternoon panel.          

Wednesday, April 24, 2024

Fresh as a Daisy designer paper and Sweetly scripted stamp set


Cute Easy card made using the Fresh as a Daisy designer series paper. I always like to bring the front of the card to the inside so I stamped and embossed a Daisy on the inside onto Bubble Bath cardstock. I usually use White or Vanilla on the inside, but my white daisy would not have shown up, and the Pretty in Pink card stock is light enough to stamp and write a sentiment on.


Products:

Stamps: Sweetly Scripted and Cheerful Daisies

Ink: Garden Green, Craft White (or VersaMark), Crushed Curry

Stampin’ Blends: dark Shy Shamrock

Watercolor pencils: Old Olive an Garden Green

Paper: Garden Green, Shy Shamrock, Bubble Bath and Basic White card stock, Fresh as a Daisy designer series paper.

Accessories: White embossing powder, Heat tool, Pretty in Pink bordered ribbon, Foam adhesive sheets, Tear & Tape, Tombo liquid glue (or Stampin’ Seal),

Paper trimmer, Paper snips


Instructions:

1.    Cut a card base 5 ½” x 8 ½” out of Garden Green cardstock.

2.    Trim daisy panel shown above to 3 ¾” x 4”. Attach to a 4” x 5 ¼” panel of Shy Shamrock cardstock 1/8” in down from top, centering on both sides using Tombo liquid glue or Stampin’ Seal.

3.    Stamp sentiment from Sweetly Scripted stamp set using a Garden Green ink pad onto a white scrap 1” x 3 ¾”. Attach below daisy panel leaving 1/8” border below.

4.    Cut a 4 ½” piece of Pretty in Pink bordered ribbon and attach to the daisy/Shy Shamrock panel in the back using Tear & Tape. (I like to also put Tear & tape on top of the ribbon on the back for extra security. I leave the top paper on so it is not sticky). I also and a very small piece of Tear & Tape to the front center leaving the sides loose. Cut a 3 ½” piece of ribbon and add to left front of card sliding under the ribbon strip and tying in a knot.

5.    Attach this panel using Foam adhesive strips to pop up the entire panel.

Inside: 

1.    Cut Bubblegum card stock to 3 ¾” x 5”. Stamp small Daisy from Cheerful Daisies stamp set using either White craft or VersaMark ink. Add white embossing powder and heat set using the heat tool. Let cool.

2.    Stamp inside of flower using Crushed Curry ink. Draw stem using Pecan Pie or Early Espresso water color pencil or Stampin’ Write Marker. Draw a left using the dark Shy Shamrock Stampin’ Blend and add veins using Old Olive or Garden Green water color pencil (or Stampin’ Write marker.

3.    Add sentiment if desired.

4.    Attach Bubblegum panel to a 4” x 5 ¼” Shy Shamrock panel. Attach to inside of card. 

Tuesday, April 23, 2024

Fresh as a Daisy designer series paper and Something Fancy stamp and die bundle

 Need a fast easy card? Start with designer paper and ribbon and sentiment and you can get a beautiful card like this. 


Obviously very tired when I glued the strip of designer paper to inside of card, lol


Products used:

Stamps: Something Fancy

Ink: Pretty in Peacock

Paper: Pretty Peacock, Wild Wheat and Vanilla card stock, Fresh as a Daisy designer series paper (retiring the end of this month)

Accessories: Stamp Cut and Emboss machine, Something Fancy dies, Wild Wheat textured ribbon (retiring the end of this month), Foam adhesive strips, Tear & Tape, Tombo liquid glue, Paper Trimmer, Paper Snips


Instructions:

1.    Cut panel from Designer paper shown to 3 ¾” x 5”. Attach Tear & Tape around all edges.

2.    Cut an 6 inch strip of ribbon and add by folding ends to back and attaching to Tear & Tape. Add an additional piece of Tear & Tape over ribbon.

3.    Attach Designer series paper with ribbon to a Panel of Wild Wheat cut to 4” x 5 ¼”.

Attach to a 5 ½” x 8 ¼” card front scored at 4 ¼” using Tombo liquid glue or Stampin’ Seal.

4.    Stamp sentiment on a Vanilla scrap and die cut using the Something Fancy dies. Attach with Tombo glue or Stampin’ Seal to Wild Wheat die cut with larger die creating a mat.

5.    Attach to card front using Foam Adhesive strips or Stampin’ dimensionals at top and bottom of sentiment panel, so it will be above and below the ribbon.

6.    Cut a 4’ x 5 ¼” panel of Vanilla card stock. Add small strip of designer paper cut off from card front at bottom.

7.    Stamp additional sentiment if desired and attach to inside of card. 

Monday, April 22, 2024

Fresh as a Daisy designer series paper

 I was inspired by a card Mary Fish did using the Fresh as a Daisy designer series paper. This paper is retiring the end of this month. I made a few modifications to her card created an inside and added a gift card holder. Here is my version. I chose not to add a sentiment so I can decide what sentiment is needed when I am ready to mail out this card.

I was able to create five different cards using that same sheet of 12x12 paper since the paper has sections with different designs all coordinating with the Cheerful Daisies stamp and die set. I will be posting a different card every day this week, so be sure to check back. 


Products used:

Paper: Early Espresso, Wild Wheat and Basic White cardstock. Fresh as a daisy designer series paper.

Watercolor pencils – assortment one (Early Espresso), Water painter

Stamp, Cut and Emboss machine, Cheerful Daisy dies and the retiring Scallop Contours dies.

23-25 In Color Jute trim (Pebbled Path)

Paper trimmer, Paper snips, Foam Adhesive strips, Tear & tape, Tombo glue


Directions:

1.    Cut a Wild Wheat card base 5 ½” by 8 ½” Score at 4 ¼”

2.    Die cut in Early Espresso card stock (4 ¼” x 5 ½”) the largest scallop die from the Scallop Contours set.

3.    Cut apart all the sections from the designer series paper. Using section pictured above trim to 3 3/8” x 4 ¾”). Using Tombo glue attach to die cut scallop.

4.    Cut a 4 ¼” piece of the Pebbled Path jute and add to front of card, putting ends through a scallop and attach to back of scallop using Tear & tape. Note. I add a small piece on the card stock then attach jute and add another piece on top to secure. I do not take off the topper as I do not want that piece to be sticky.  

5.    Add strips of Foam adhesive strips except over jute to pop up the entire scallop to card front.

6.    Cut and White panel 3 ¾” x  5”. Stamp sentiment if desired and add to an 4” x 5 ¼” Early Espresso panel. Attach to inside front of card.

7.    Cut a panel of Wild Wheat 4 ¼” x 1 ½”. Using Basic White scraps cut three daisies from the die set. Using color the flower center using a Water color pencil and blend using a Water Painter brush.

8.    Add stems and leaves to Wild Wheat panel and glue daisies using Tombo glue.

9.    Add Tear & tape to sides and bottom only (do not add tape to top as you want to be able to slide in a gift card). Attach panel to inside of card. 

Tuesday, April 16, 2024

Layers of Beauty and Texture paste with decorative masks

Here is a sneak peek of the Layers of Beauty stamp and die set available in the May 2024 - April 2025 annual Catalog. The background is done using the Shimmery Texture Paste and a decorative mask from the foursquare decorative mask set retiring the end of this month. 

Products:

Stamp Set: Layers of Beauty

Ink: VersaMark

Reinkers: Balmy Blue

Watercolor pencils: Flirty Flamingo, Granny Apple Green, Daffodil Delight and Pecan Pie

Paper: Basic White and Balmy Blue

Accessories: Stamp Cut and Emboss machine, Layers of Beauty dies, Foursquare decorative masks (retiring end of this month), Shimmery White Embossing Paste, F clear block, Palette Knives, Silicone craft sheet, Water Painters, Silver embossing powder, Heat tool, Tombo multi purpose glue, Stampin’ dimensionals, Paper trimmer, Paper snips


Technique:

1.     Tape down to Silicone mat a piece of Basic White cardstock 5 ½” x 4 ¼”.  Tape mask from the Foursquare decorative masks down on top of cardstock.

2.     Using a Palette knife put some paste on the block. Add one drop of Balmy Blue reinker to paste and mix well. Spread paste over mask scrapping off excess. I purposely left some areas blank to add a distressed look. Set aside to dry.

3.     Repeat on a piece of card stock 4 ½: x 1 ½” Cut down to 4 ¼”x 1 ¼” once dry.

4.     Stamp roses on on 4 ½” x 5 ½”  piece of Basic White card stock using VersaMark ink and emboss with Silver embossing powder using the heat tool. Stamp smallest rose (far right) on 2 ½” x 2” scrap and emboss with Silver embossing powder.

5.     Color roses with Flirty Flamingo watercolor pencil, going darker towards center. Color Daisies with Daffodil Delight pencil. Color daisy centers with Pecan pie. For the leaves I just added pencil lines next to veins. Use a Water painter to smooth and spread out color on flowers and leaves. Make sure to wipe off water painter brush between colors.

6.     Die cut image using large die from the Layers of Beauty die set.  You can also die cut the small rose you will just need to cut off excess around bottom of rose.

7.     Cut panel once dry down to 5 ¼” x 4” and adhere to Balmy blue card (8 ½” x 5 1/2” scored at 4 ¼”) using Tombo glue. (Note: I start with a piece of cardstock slightly larger than I need so I can trim off the part without paste where the paste was)

8.     Stamp sentiment on scrap of Basic white with Balmy Blue ink. 

9.      Pop up floral image and sentiment using Stampin’ Dimensionals. Note: I made a small slit around one leaf to tuck my sentiment behind, pulling the lower rose on top of sentiment.

10. Add a 4” x 5 ¼” panel to inside of card. Trim panel with embossing paste to 1 ¼” x 4” and adhere to far left side of card.

11. Add small rose to inside using Tombo Glue. Add additional sentiment if desired.  

Tuesday, April 9, 2024

Cutest Cows bundle

Don't you just love this adorable cow. It comes with three heads and three bodies that are interchangeable, chickens, flowers and amazing sentiments. You can view it here: 
https://www.stampinup.com/products/cutest-cows-bundle-english


Directions: 

1. Emboss two Cherry Cobbler panels (4" x 5 1/4" and 2 3/4" x 3") and two strips of Basic White 4 1/2" x 1/4") with the Timber 3D embossing folder .

2. Add a strip (1" x 4") of Granny Apple Green at bottom of large Cherry Cobbler panel stamping first with sentiment using Momento Black ink.

3. Add Basic White strips in cross pattern to smaller Cherry Cobbler panel and trim off edges and add to a Basic White panel (2 7/8" x 3 1/8"), 

4. Attach (barn door) above the Granny Apple Green (grass). 

5. Attach to a Basic White card base (8 1/2" x 5 1/2") as shown in photos. 

6. Cut a 5 1/2" x 4 1/4" Cherry Cobbler and add to inside of card. Trim off, (if necessary) any that might show on back of card. Cut a 4" x 5 1/4" Basic white panel, but do not glue down yet.

7. Stamp Cow and sentiment on Basic White panel. Color with Stampin' Blends. I used the dark Petal pink for the snout and light Petal Pink for ears and udders. I used dark Basic Black for spots and tip of tail and dark Smokey Slate for remainder of tail. 

8.  TIP: punch put a template on a 3" x 3" scrap of Basic white cardstock. Place head and body stamps  in holes punched out and pick up stamps using an acrylic block. Stamp on scrap of  Basic White, color with Stampin' Blends and punch out. Your stamps will line up with the punch since you placed them in the right position using your template. 

9. Add a small amount of Tombo glue to glue head to body and pop up on card base using Stampin' Dimensionals. 


Supplies:

Stamp set Cutest Cows

Ink. Basic Black

Stampin’ Blends: dark Smokey Slate, dark Basic Black, light and dark Petal Pink

Paper: Basic White, Basic Black, Cherry Cobbler and Granny Apple Green

Accessories: Stamp Cut and Emboss machine, Specialty plate, Timber 3D embossing folder, Cutest Cow builder punch, Paper trimmer, Paper Snips, Stampin’ Dimensionals, Tombo multi liquid glue

Monday, April 8, 2024

Color & Contour stamp set is retiring and introducing Shy Shamrock (new In Color)

I was asked this month about Blender pens. To be honest they have never been one of my go to tools. So today I decided to pull one out and give it a try since it has probably been 10 or more years since i used one. I was pleasantly surprised to find out they are not my arch nemesis. To create this card I simply inked up my H block with Bubble Bath ink and spritzed it with water and applied it to my card just like you would a stamp. My original plan was to just stamp the flower and not do any coloring, but the one flower on the right looked so sad and lonely being white. After coloring it in using my ink pad an blender pen, I decided to add a little green also. Finishing off with the sentiments that came in the set and sequins I had quick and easy card. 

Stamp set: Color & Contour stamp set retiring the end of this month!

Ink: Momento Black, Bubble Bath and Shy Shamrock (new In Color available next month)

Paper: Basic Black, Basic White and Bubble Bath

Accessories: H block to color block, various blocks for stamping, Pastel adhesive backed sequins (retiring the end of this month), Blender pen, Stampin' Spritzer, Paper trimmer, Simply Scored, Tombo multi liquid glue


Thursday, March 28, 2024

Magnolia Mood - Online extra

Magnolia Mood

1.Using the Stamp Cut and Emboss machine emboss cardstock vellum (4" x 5 1/4') with the Exposed Brick 3d embossing folder using the Speciatly plate
2. Stamp Magnolia using Momento Black on Thick Basic white card stock.
3. Using Stampin' Blends color leaves with Light Mossy Meadow, the center with light Daffodil Delight and the petals with light Petal Pink just at the base.
4. Using the Stamp Cut and Emboss machine die Cut Magnolia die using Basic White cardstock. 
5. Stamp Sentiment on scrap of basic white and die cut using the Wonderful thoughts dies. 
6. Glue stamped flower to die cut flower using Tombo glue. Add to embossed vellum using Stampin' Dimensionals. Attach sentiment using Tombo glue. 
7. Glue Vellum to a 4" x 5 1/4" piece of Petal Pink card stock, only adding glue behind flower and sentiment. Your corners will not be glued down. 
8.Using a 5 1/2" x 8 1/2" card base of Mossy Meadow, score at 4 1/4"
9. Glue Petal Pink card front to front of Mossy Meadow card. 
10. Stamp small magnolia flower to bottom, right corner of 4" x 5 1/4 panel using Momento black ink.  Color same as card front.
11. Add inside panel to card adding a sentiment if you wish. 
12. Also add small magnolia flower to envelope and color or leave uncolored. If stamping on the front of envelope place on bottom left side, or stamp on the back flap. 


Stamps: Magnolia Mood stamp set (online extra) and wonderful thoughts ( sentiment). 
Stampin' blends: Light Mossy Meadow, light Petal Pink, light Daffodil Delight 
Ink pads: Momento black and Mossy meadow ink. 
Paper:  Mossy Meadow, Petal Pink and white cardstock and cardstock vellum, 
Accessories: Stamp cut and Emboss machine, Specialty plate, Wonderful Thoughts dies, Magnolia Mood dies, Exposed Brick embossing folder, wonderful thoughts dies, Stampin Dimensionals, Tombo glue

inside


Wednesday, March 27, 2024

Hey Chuck (rooster) and Rays of Light stamp sets

Both the Hey Chuck (rooster) and Rays of Light stamp sets are retiring soon. I actually wanted to use the Rays of Light and was looking for something to go with it and thought this crazy rooster was perfect. I just love the sentiments that come in the Hey Chuck stamps set and just couldn't resist putting the cake on the fence on the inside.

Stamps: Rays of Light and Hey Chuck
Ink: Momento Black
Blends: dark Real Red, Medium (SU500), dark Daffodil Delight, dark and light Calypso Coral, light and dark Pecan Pie
Paper: Cajun Craze and Basic White
Accessories: Stamp, Cut and Emboss machine, Hey Chuck dies, Stampin' Dimensionals


Inside of card


Tuesday, March 26, 2024

Sending Smiles stamp and die set- retiring soon

 Sending Smiles stamp and die set

 I just had to make one more card using the Sending Smiles stamp and die set before it retires on April 30, 2024. I love it with the Hello Irresistible 6x6 designer Series paper, one of our on line exclusives. The front panel is cut using the Radiating stitches dies.


Products used: 
Stamps: Sending Smiles
Ink: Flirty Flamingo, Lost Lagoon and Pecan Pie
Paper: Lost Lagoon and Basic White card stock, Hello Irresistible 6x6 designer series paper
Accessories: Stamp, Cut and Emboss machine, Sending Smiles dies, Radiating stitches dies, Opaque ovals, Stampin' dimensionals, Paper trimmer, Tombo multi purpose liquid glue, Basic White medium envelopes. 


Wednesday, March 20, 2024

Magnolia Mood

Magnolia Mood stamp and die bundle (online exclusive)

Magnolia Mood stamp and die bundle (online exclusive). Granny Apple Green ink pad, light and dark Soft Sea Foam, light and dark Petal Pink and light Lemon Lolly Stampin’ blends, Petal Pink, Granny Apple Green and white card stock, Stamp Cut and Emboss machine, Specialty plate, Time worn Type embossing folder (the brick folder is carrying over to the new catalog, but this one is being retired) Everyday Details dies and Lasting Joy stamp set (sentiment), Stampin’ Dimensionals


Petal pink and Granny Apple green Stampin’ Write markers where used direct to rubber on magnolia stamp. 


Tuesday, January 9, 2024


 I would love you to be part of my team, for more information contact me or visit www.janetloves2stamp.stampinup.net

Customers who sign up to be a Stampin’ Up! demonstrator during Sale-A-Bration! Customers who join our fun crafting community as a new demonstrator can get $125 USD worth of product PLUS our Stampin’ Glass Mat Studio* (a $60 USD value) for just $99 USD.
Customers who want to join Stampin’ Up! during Sale-A-Bration but are interested in a different join option can instead get $125 USD worth of product PLUS an additional $30 USD worth of product of their choice when they join for $99 USD. That’s a $155 USD value!
STAMPIN’ GLASS MAT STUDIO
The Stampin’ Glass Mat Studio is a paper crafter’s dream! The heavy-duty glass mat comes printed with a ruler and grid lines for easy measuring, while the large surface space gives ample room for spreading out while paper crafting. The safety-tempered glass has a heat and scratch resistant surface that wipes clean with the included cloth and water—no chemicals needed. The reusable cloth also cleans ink off your stamps! The nonslip, heat resistant, waterproof silicone mat features four palette squares for mixing custom ink colors or for holding small ink spots in place while crafting. Each component can be used separately or you can use all three items together for a multipurpose paper crafting studio that’s both functional and elegant.
The Stampin’ Glass Mat Studio includes:
GLASS MAT
* 5 mm thick
* 17" x 14" (43.2 x 35.6 cm)
* Safety-tempered
* Heat and scratch resistant
* Wipes clean with water or alcohol
SILICONE MAT
* 8-3/8" x 6" (21.3 x 15.2 cm)
* Multiuse, nonslip
* Waterproof, heat resistant
* 4 palette squares for custom-color mixing or holding Stampin’ Spots
* Product color: white
CLEANING CLOTH
* 8-1/4" x 8-1/4" (21 x 21 cm)
* Durable, reusable
* Lint free
* Cleans stamps and other surfaces with only water
* Product color: dark gray