Wednesday, August 17, 2011

Happy Birthday Doily in Black and White

This is another card that we will make at stamp camp this month. I just love the new Doily stamps, don't you? I will post my ATC trade later where I used this same stamp set.

I saw a post on a Stampin' Up! demonstrator website with this card on it. So I googled and found her blog so I would have a link to show you here card. Thank you Lyssa for the great idea. I embossed the sentiment, all my dollies and sponged my paper daisy with basic Black ink (just enough so that it is not so white). I used a different sentiment and did not use the spritzer, but the Confetti white paper instead. I only wrapped my ribbon around once, but I like the twice also. And I did not put the pearls on my ribbon.
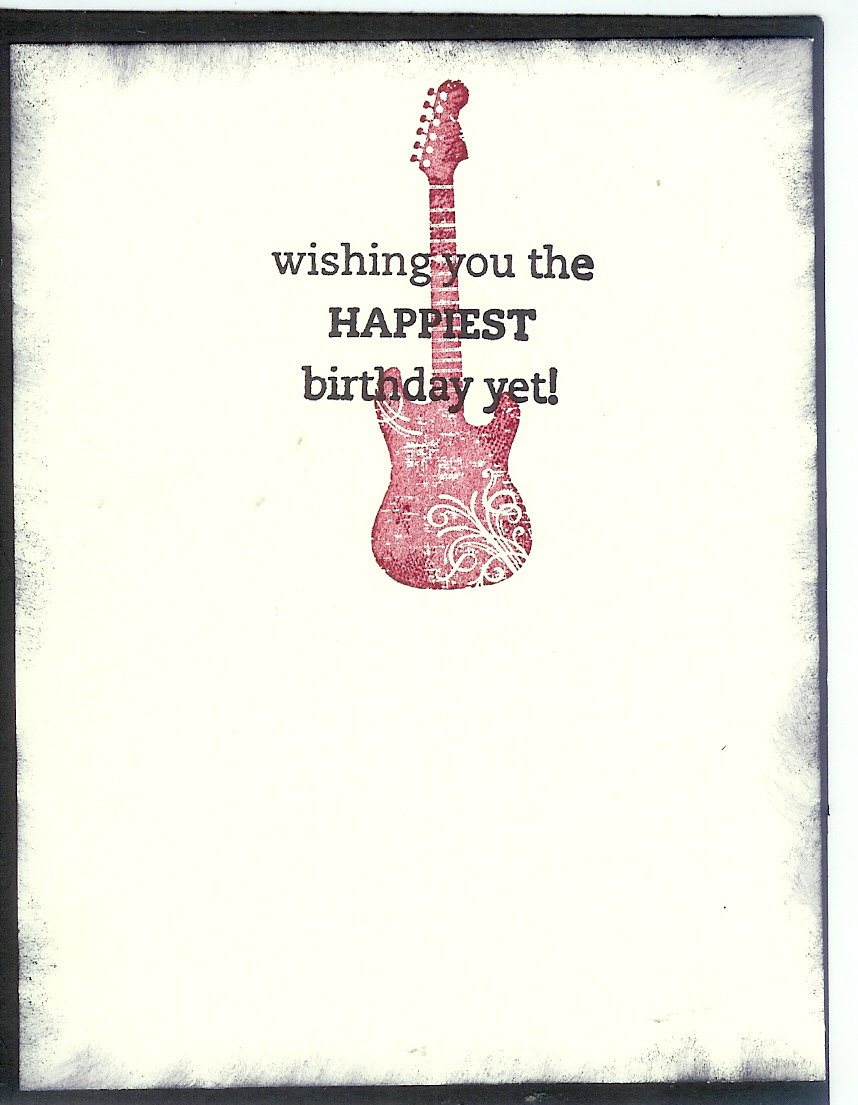
Here is my card:

All supplies Stampin' Up!
Stamps: Delicate Doilies, hello Doily and Perfectly Penned
Ink: Basic Black Craft
Paper: Confetti White and Basic Black
Accessories: Embossing Buddy, Heat Tool, Black embossing powder, Basic Black 5/8" Satin ribbon, 3/8", 1/8", 1 3/8" and 1 1/4" circle punches, Paper Daisies, Basic Pearl Jewels, Stampin' Sponges, Stampin' dimensionals
Wish Big Pennant Parade Birthday card

Hi! Guess what? I am still alive and living in Summerville, South Carolina. I really apologise for not keeping up this blog better, and promised to make a much better effort.

Here is one of the projects for this months stamp camp. Yes, I am having a camp. The date is Monday, August 22, 2011 at 6:00 pm. Be sure to call, text or phone in your reservations.

I love this first card. I saw where someone had made a taller version and had a box attached, much like these I did last Halloween. I just made it much smaller. so that it would fit into a regular A2 (Stampin' Up! Medium) size envelope. No matter the size, I am sure you will have as much fun making this card as the person receiving does when they open it.


All supplies Stampin' Up!
Stamps: Pennant Parade and Word Play
Ink: Island Indigo, Calypso Coral, Lucky Limeade, (don't you just love, love, love these new In Colors? They are tooo yummy!) Daffodil Delight and Basic Black.
Stampin' Write Markers: Basic Black, Lucky Limeade, Island Indigo, Poppy Parade and Daffodil Delight
Paper: Poppy Parade (yes, we still have last years In Colors), Daffodil Delight and Whisper White
Accessories: Signo White gel pen, Petite Pennants builder and 2 3/8" Scallop circle punches. Big Shot die cutting machine, Circles Original die, Star Burst jumbo wheel, Jumbo handle, Hemp Twine and Stampin' dimensionals.

Tuesday, May 17, 2011

National Scrapbooking Month Sale - Don't miss out!!!

Click here to see the great deals available during National scrapbooking month. But hurry, these deals are only available for a limited time. You can order on line, or save on shipping by contacting me with your order.

Happy Stampin'
The Open Sea - flip flop card

I am so sorry it has taken me so long to get these projects posted. This months stamp camp will focus on masculine projects since Father's Day is fast approaching us, but they are also designed so that they could be used for birthday, anniversary, thank you, or any other card giving occasion. This particular card is not that hard to do, even though it looks complicated. Here is a picture on one sample in the closed position. The sample posted below is opened. (When you open the ship's panel flips to the sentiment side).

By the way, don't you just love the stamps, paper and twine used? They are all new products from the Summer Mini Catalog. Contact me to get your own copy, or just click on the picture on the left to view the book on line.

All supplies Stampin' Up:
Stamps: The Open Sea
Ink: Early Espresso and Not Quite Navy classic ink pads and Stampin' Write markers
Paper: Naturals Ivory, Cherry Cobbler, Early Espresso and Nautical Expedition Designer Series Paper
Accessories: Early Espresso/White Bakers Twine, 3/4", 1 1/4"  & 1 3/8" circle punches. Paper cutter with scoring blade.

This sample uses the Cherry Cobble/White Bakers Twine.

Thanks for looking and happy stampin'!

Saturday, April 9, 2011

Apron box holds recipe cards made with the "From the Kitchen of" stamp set
I found this cute apron box that holds the stamped recipe cards made with the "From the Kitchen of" stamp set, but now I cannot find where I saw it from to give credit. I did make a few changed to the box I saw. I changed the card stock and designer paper used, changing also the colors used. I added the flower brads instead of the jumbo eyelets for the neck ribbon, and changed the ribbon across the middle. I also added the eyelet top to the pockets and stitching around the pockets. I also left off the stamped image in the bodice area and the bow in the back.

Here are the boxes both Denise and I made, and some of the recipe cards that go inside. I am going to tweak the measurements since the box is wider than needed for the recipe cards and have my class make the smaller version. I will scan the smaller version and measurements next week, so check back.

Happy Stampin!

All supplies Stampin' Up! unless noted.

Stamps: From the Kitchen of
Ink: Basic Black Classic
Paper: Riding Hood Red (top apron), Pear Pazzazz & Rose Red (bottom apron), Very Vanilla and Whisper White card stock and Springtime Vintage Designer Series Paper (both)
Accessories: Night of Navy 1/4" and 5/8" grosgrain ribbon (top), Old Olive 1/4" and 5/8" ribbon (bottom), Subtle flower brads, Eyelet border punch, Sticky Strip, Mat Stack and Paper Piercer, misc. Stampin' Write Markers
Sew Suite Mannequins card using Love Letter Designer Series Paper

I finally decided to order this stamp set, just got it in today, and here are the cards Denise and I came up with for this months Mother's Day/Feminine cards Stamp Camp. Now I love this set but I promise not to make my whole camp based on this set, even thought it would be sew easy to do. (ha! ha! I made a pun) I really love what we came up for the inside. I even added the pin cushion to my inside and painted the pin heads with the Moonlight Smooch. I know my "Hand crafted" on my tag is not as good as the "Love" Denise used for a Mothers Day card, but I already made my Mom's card, so this will be used for something else. I really liked the "Hand crafted" with the sewing set. I am also excited that this card was a perfect time to pull out the Tiny Trinkets.

The inspiration for this card came from a card made by Diana Ball, a fellow demonstrator. We made the following changes. We made our card Red and also added an extra panel using red on our card.  We left off the flower, changed the sentiment on the tag. We also used a different patterned paper on the bottom front, Denise changed the top panel also. Denise also folded back one corner at the top of the card. You notice we even put our red panels on different sides and used different papers for our mannequin's.

If you like this stamp set, you need to hurry and order it as it is in the Occasions mini catalog that ends on April 30, 2011. Just click on the Shop Now button or call me to place your order.

Supply list (all supplies Stampin' Up! unless noted):

Stamps: Tiny Tags, Sew Suite
Ink: Basic Black classic
Paper: Riding Hood Red, Basic Black, Very Vanilla and Love Letter Designer series paper
Accessories: 1 1/4" Basic Black striped grosgrain ribbon, Sponge Daubers, Tiny Trinkets, Sticky Strip, Stampin' Dimensionals, Moonlight Smooch Pearlized Accent Ink

Monday, March 28, 2011

Felt Roses Napkin Ring made using the Table Setting Bigz XL die


Here is a napkin ring I made using the Table Setting Die, Isn't it fabulous??? What an elegant table you could have with a set of these napkin rings. Felt is very iinexpensive, so you could made a set for everyone on your shopping list and save a lot of money to buy more stamps!!!!  These roses are so easy. Our die even has a round tab at the end to use as a base to glue your rose together. I can't wait to try these roses on paper, and other fabrics. I'm wondering what fleece would do since it does not have the body that felt has, I will try it and let you know. Enjoy these roses.

Stampin' Supplies:
All supplies Stampin' Up! unless noted

Ink: Garden Green Stampin' Write marker
Accessories: Big Shot die cutting machine, Table Setting Bigz XL die, Island Floral original die (for the small rose- by the leaves), Extended cutting pads, Felt and Hot glue gun and glue not Stampin' Up!

No stamps are paper were injured in the making of this project.

Happy Stampin'

Sunday, March 27, 2011

Felt Roses card made with the Table Setting Bigz XL die

Here is a card I made using the swirl on the Table Setting Bigz XL die made for the Sizzix Big Shot exclusively for Stampin' Up! Click on the "Shop now" button to order or contact me. The white specks in the picture are actually sparkles I added using the Smooch Spritz Vanilla Shimmer spray to the entire finished card I looks really cool on the rhinestones. This is a case of a card I saw on Stampin' Connection by  Donna Perger. I opted for a red card and a brown mat and added two large roses and a small rose, and did not use rose buds. The small rose was made using two of the smallest flower on the Blossom Party Original die. I simply snipped in between two of the petals and rolled. I glued this piece in the center of the other flower die cut at the same time. I also changed the roses to felt instead of paper. The small white flower was made with the smallest flower on the Boho Blossom punch. First I put the petal in the palm of my hand and using the end of my bone folder, I made small circles in the middle of the flower until it curled up. I then snipped between two of the petals to the center of the flower. I then glued one petal on top of the other which really makes the flower dimensional. I then added rhinestones in each flower and attached them to the card with mini glue dots. The Celery leaves are glued flat down. I took the larger Garden Green leaves and curved up the sides a bit also using my bone folder. You can also make beautiful roses with card stock and Designer paper. Have fun making these fabulous roses and check back tomorrow for a fun surprise!

Happy Stampin'

All Supplies Stampin' Up!
Stamps: none, but will stamp sentiment inside later
Ink: none
Paper: Read Red, Early Espresso, Very Vanilla, Certainly Celery, Garden Green and Whisper White
Accessories:  Big Shot die cutting machine, Table Setting Bigz XL die, Little Leaves sizzlet die, Blossom Party Original die, Perfect Polka dots Textured Embossing Folder (all three dies and embossing folder are exclusive to Stampin' Up!), Extended Cutting pads, Boho Blossom punch, Jewels, Basic Rhinestones, Mini Glue Dots, Smooch Spritz Vanilla Shimmer spray, bone folder.

Saturday, March 26, 2011

Birthday Candle card made using the Table Setting Bigz XL die

My hostess today had asked me to do a project using the Table Setting Die, so this is the project that I used for their make and take. I have to give credit to Connie Babbert for this wonderful card. I saw several candle cards but I decided to case Connie's. You can view her card here.  I did change the colors, the Designer Paper and left off the bow on my ribbon and added the sentiment on the front of the card. I also used glossy white paper on this card. I used the
Elegant Bouquet Textured Impressions folder on this card, but decided I like the Finial Press on a candle, so that is the folder they used today on their cards. I also used some scrap rubber in the center of my candle to make it stay rounded, then put sticky strip on the edges to hold them down. I sponged the flame first with Daffodil Delight then with Pumpkin Pie, the candle and oval for sentiment was sponged with Blushing Bride. I will be posting additional projects using the Table Setting die this week, so check back often. Happy Stampin'

All Supplies Stampin' Up!
Stamps: Teeny Tiny Wishes (outside sentiment), Bring on the Cake (inside message)
Ink: Pumpkin Pie, Daffodil Delight, Chocolate Chip and Blushing Bride classic inks
Paper: Whisper White, Early Espresso, Pear Pizzazz, So Saffron and Glossy White card stock, In Color Designer Series Paper Pack (Blushing Bride)
Accessories: Big Shot die cutting machine, Table Setting Bigz XL die, Extended cutting pads, Elegant Bouquet Textured Impressions embossing folder, Scallop Oval and 1 3/8" x 5/8" (small) Oval and Scallop Edge Border punches, 1/2" Blushing Bride Stitched Poly ribbon, Stampin' Sponges and Sponge Daubers, Stampin' dimensional

Monday, March 21, 2011

His and Hers Precious Little Baby Booties

When my hostess for next Saturday asked if we could do the baby booties on page 78 of the current (2010/2011) Idea Book and Catalog, I must admit I was not overly excited about it. But not that they are done I must admit I really like them and wanted to post and share them with everybody. I decided to leave the strap off the boy bootie and use a ribbon instead of paper strap on the girls. I also added little embellishments on the front. Don't you just love the Vanilla Rosettes on the girl bootie? They are in our Occasions mini catalog, so you need to get yours before April 30, 2011. These little ribbon rosettes can be dyed with classic Stampin' Up! ink to create flowers that coordinate with whatever project you are working on.

Contact me if you would like to have a workshop in your home and make this precious booties as your make and take project. 

All supplies Stampin' Up!
Stamps: None, (it's OK Janet, breathe, breathe! )
Ink: None again (how am I going to survive this project?)
Paper: Designer Series Paper Pack -Subtles Collection (starting to feel better now)
Accessories: (Now were talking!) 1/8" Very Vanilla Taffeta Ribbon, Vanilla Rosettes. Subtles collection brads, Paper Piercer and mat pack, or you can use your Crop-a-dile, Hodgepodge Hardware, Mini glue dots.

Sunday, March 20, 2011

Milk Carton Bird House filled with Jelly Bird Eggs

This is another of the fun projects we will be doing at this months stamp camp. I used the Milk Carton Bigz L Die (a Stampin' Up! exclusive die) to make the milk carton. I stamped the milk carton with the Woodgrain Background stamp before putting it together. I normally stamp just the birds feet on the front of the bird house before assembly, but since I forgot I just stamped it on a Crumb Cake scrap so I would not have to be so fussy about cutting it out. (actually I think Donna stamped it and Denise cut it out, since they were over when I was making the sample). I have been wanting to make this for a couple of weeks, but couldn't find the small Jelly Bird Eggs, I didn't want the large Jelly Beans. Anyway, the birds body was stamped on So Saffron, cut out and attached with a Stampin' Dimensional. To make the hole, fold up one bottom flap and punch. When assembling make sure the punched piece is between the top and bottom flap so it does not show. I only put adhesive on one side of the opening at the top, so this does still open like a milk carton. The roof is just seven rows of Chocolate Chip card stock punched with the Scalloped Edge punch and sponged.

Thanks for looking. If you need any of the supplies to make this project contact me, or visit my on line store. Happy Stampin'

All supplies Stampin Up!
Stamps: Woodgrain background, Fun and Fast Notes
Ink: Chocolate Chip Classic ink pad, Chocolate Chip and Pumpkin Pie Stampin Write Markers
Paper: Crumb Cake, Chocolate Chip, So Saffron, Certainly Celery, Pink Pirouette and Bashful Blue cardstock, Medium window sheet
Accessories: Big Shot die cutting machine, Milk Carton Bigz L die, Punches: Scalloped Egde Border, Boho Blossoms, 2 Step Bird (leaves) and 1" circle. Mat Pack, Paper Piercer, Brights collection 3/16" brads, Stampin' Dimensionals, Stampin' Sponges.

Saturday, March 19, 2011

Monochromatic Crosses of Hope and Easter Blossom cards

You will have the choice of one of these two charming cards at this month stamp camp. This is a fast easy card with a minimum of supplies. With the Big Shot machine you can take your cards to the next level and make them fast and fabulous. If you order your Big Shot before the end of March you will earn two free Sale-a-bration stamp sets. Visit my on line store or contact me for more details.

All Supplies Stampin' Up!
Stamps Crosses of Hope (top card) and Easter Blossoms (bottom card)
Ink: Rose Red
Paper: Whisper White and Rose Red
Accessories: Big Shot die cut machine, Vintage Wallpaper Textured Impressions embossing folder, 3 1/2" and 3" circle Original Dies, Rose Red Seam Binding, Stampin' Sponges, Stampin' Dimensionals.

Stop back by tomorrow to see my Milk Carton Bird House


Monday, March 14, 2011

Punch Art Bunny with Carrot


For Easter I just had to make this adorable bunny holding on to his beloved carrot. There are a lot of different punch art bunnies out there and I wish I could find where I saw this one so I could give credit. I did make a few changes in punches, opting to use the Boho punch for hands (paws) and the Little Leaves Sizzlet for the carrot top. I free handed the carrot and eyes. You cannot tell in the scan, but I put Crystal Effects on his eyes and teeth. Thanks for visiting my blog, leave a comment and let me know what you think of Mr. Bunny, also don't forget to click on "follow this blog".

Happy Stampin'

All supplies Stampin' Up! unless noted
Stamps: Inspired by Nature
Ink: Crumb Cake, Certainly Celery and Bashful Blue
Paper: Whisper White, Garden Green (will use Wild Wasabi next time), Blushing Bride, Pumpkin Pie, Marina Mist and Certainly Celery.
Punches: 1" x 1 3/8" (wide) oval, 1 3/4" x 7/8" (large) oval, 1 3/8 x 5/8" (small), Word Window, Boho Blossom, 3/4" circle, Heart to Heart, 2 Step Owl (circles on feet)
Accessories: Big Shot, Little Leaves Sizzlet die, Signo White gel pen, Soft Suede Stampin' Write Marker, Stampin' Sponges, Stampin' Dimensionals, Crystal Effects, Tweezers (not SU), hand made cloud template (not SU)

Sunday, March 13, 2011

Bird House Artist Trading Card

I am in a swap every month with a group of very talented ladies. We swap ATC's (Artist Trading cards). Just in case you are not sure want that is. It is a small 2 1/2" x 3 1/2" card. Our theme this month was birds, so this is what I came up with. You cannot tell on the scan, but I put Crystal Lacquer on his eye, I also used it on the roof. I have a small pearl inside the flower. The bird is sponged with White craft, then after dry with Chocolate Chip. I stamped the legs only on the bird house, then stamped the birds body on Daffodil Delight, cut out, sponged and added with a Dimensional. Looking at it now, I should have sponged the flower, Oh well, hindsight is 20-20. Hope you enjoyed it, thanks for stopping by. Stamp camp projects will be coming soon.

Happy Stampin'

All supplies Stampin' Up!
Stamps: Fun and Fast Notes, Woodgrain background
Ink: Chocolate Chip classic, Whisper White craft, Pumpkin Pie and Chocolate Chip Stampin' Write markers
Paper: Crumb Cake, Chocolate Chip and Daffodil Delight
Accessories:  1 1/4" circle punch, Sponge daubers, Stampin' Dimensionals, Crystal Effects, Boho Blossom punch, and Jewels Basic pearls

Friday, February 25, 2011

Shabby Nature's Nest Turtle card
I have had this little turtle quite a while and haven't had a chance to use him. But, when I saw Pat's  card using the Bison from the In Wilderness stamp set, I just had to pull my little turtle out and make this card. Beside changing the stamp set, I changed the colors and added a background stamp on the Olive panel. I am quite happy with it, what do you think?

All Supplies Stampin' Up! unless noted
Stamps: Natures Nest and Wonderfully Worn background.
Ink: Black StazOn, Crumb Cake and Early Espresso classic ink pads.
Paper: Old Olive, Crumb Cake and Very Vanilla card stock.
Accessories: Big Shot, Perfect Details Texturz Plate, Standard Texturz Silicone Rubber, Standard Texturz Impression pad, Stampin' Pastels (Old Olive, Crumb Cake, Chocolate Chip and Early Espresso), Stampin' Sponges, Distressing tool from the Cutter Kit and 5/8" Early Espresso grosgrain ribbon. Spritzer bottle (not SU, but you can use a empty Stampin' mist bottle).

Thanks for looking.

Thursday, February 24, 2011

Inspired Dryer Sheet Technique
One of my clubs wanted to do the dryer sheet technique, so this is what I came up with. When I thought about a muted look over a stamp Inspired by Nature (one of my all time favs) immediately came to mind. This picture doesn't show off the glitter, I really wish you could see that. I think this card will eventually make it into a stamp camp (maybe for Mother's day).

You will want to used a dryer sheet that has been used several times, you need it to be soft, not stiff. You can attach the dryer sheet with your Zyron, I tried that and spray adhesive and preferred the spray, (except for the order, you want to do this outside, or have a window open). I thought the Vintage Wallpaper embossing folder added a nice touch to the finished card. I felt adding a sentiment, ribbon or other embellishment wasn't needed. Below is the list of supplies used for this project. I hope you enjoyed, Happy Stampin'

All supplies Stampin' Up! unless noted

Stamps:  Inspired by nature
Ink: Bashful Blue, Marina Mist and Wild Wasabi classic ink pads
Stampin' Write Markers: Wild Wasabi, Garden Green, Soft Suede, Early Espresso, Cherry Cobbler and Riding Hood Red
Paper: Cherry Cobbler and Whisper White
Accessories: Big Shot, Vintage Wallpaper Textured Impressions embossing folder, Dazzling Diamonds glitter, Powder Pal, Stampin' Sponges, Sticky Strip
Non-Stampin' up supplies: Spray adhesive and used dryer sheet
Techniques: Dryer sheet, sponging, DTR- direct to rubber, masking

Thursday, February 17, 2011

Elegant (Soiree) gift card purse
This cute little purse is actually not just a pretty purse, cut also a card, and a gift card holder. This is a cute, fun and fast little purse to make, and you can add anything to the front, but I was dying to use my Build a Blossom stamp set and coordinating Blossom Petal punch. Using the Big shot for the purse and purse handle and then a punch matching the flower petals, really make this card, unlike most of my cards, not labor intensive at all.

All Supplies Stampin' Up! unless noted:
Stamps: Build a Blossom, Short and Sweet
Ink: Baja Breeze, VersaMark
Paper: Baja Breeze and Very Vanilla card stock, Elegant Soiree Designer Series Paper
Accessories: Big Shot die cutting machine, Scallop Oval and Top Note dies, Scallop border, Blossom Petal, 1" circle and 1/2" circle punches, Crystal Effects, Irridescent Ice embossing powder, Stampin' Dimensionals, Stampin' Sponges, Magnetic Snaps (not SU)

Sunday, February 13, 2011

Extreme Guitar - great card for a teen or preteen boy
Here is the third card for this months stamp camp. This is a great card for a boy. I gave this to my 20 year old grand son for his birthday and he liked it, so in my opinion that means it passed the test. I cased this card from Stasia Sloma another Stampin' Up! demonstrator. I made the following changes: I embossed the stars with a Textured Impression folder, left off the brads and added my Happy Birthday sentiment cut apart and place on the textured stars.


All supplies Stampin' Up!
Stamps: Extreme Guitar, Grunge Rock and On Your Birthday
Ink: Black StazOn, Cherry Cobbler classic ink
Paper: Basic Black, Whisper White and Cherry Cobbler
Accessories: Big Shot, Square Lattice Textured Impressions folder, Clear Circle Bigz die, Stampin' Sponges, Stampin' Dimensionals, Star punch (retired) and Extra large Star punch (you can use the Stars #2 Original die)

Saturday, February 12, 2011

Create a Cupcake and Build a Cupcake punch
This is another one of the birthday cards that you can make a February's stamp camp. This card features the new Create a Cupcake stamp set and coordinating Build a Cupcake punch. The flame is our new Red Glimmer paper. The stamp set, punch and Glimmer paper can all be found in the new Occasions Mini catalog. You can view the catalog here.
I cased (copy and share everything) the card sketch from Glenda Calkins, another Stampin' Up! demonstrator. I did change the colors, added the glimmer flame and the Happy Birthday sentiment.I also added the Perfect Polka Dot embossing Folder. She had posted her card on Stampin' Connection, which is a web site for Stampin' Up! demonstrators to share their ideas with one another. When you join my team, you will also have access to this valuable tool. You can contact me directly or visit here for more information about the Stampin' Up opportunity. My recruit password is Janetstamps29485.

The punch coordination with the stamp set really makes this a fun, fast card.

All supplies Stampin' Up!
Stamps: Create a Cupcake
Ink: Early Espresso, Marina Mist and Basic Black classic ink pads, Wild Wasabi Stampin' Write marker
Paper: Wild Wasabi, Marina Mist, Whisper White and Crumb Cake card stock. Subtles (Marina Mist) Designer Series Paper and Red Glimmer paper
Accessories: Big Shot Die cutting machine, Perfect Polka Dots Textured Impressions folder, Build a Cupcake, Scallop Trim, Modern Label and Word Window punches, Stampin' Dimensionals, Two way glue, Paper Piercer, Mat Pack, and Gold brad.

Enjoy and Happy Stampin'

Friday, February 11, 2011

Wish Big birthday card featuring the stamp set "Bring on the cake"
February's stamp camp will feature birthday stamps, because we always need birthday stamps don't we? I always have requests for cards for males. LeeAnn Greff had a great card on her blog that I used for my inspiration. I changed the colors, ribbon, Designer paper, and used the Build a brad on my ribbon. I think this is a great card for a man, and not the usual car or deer card. This is a new stamp set from the Occasions mini catalog. I love this set, it has 13 stamps in the set and the price is unbelievable. Wood mount averages only $3.00 per stamp!, unmounted is only $2.15. What a great deal. You can order your copy here. This is only one of the four great cards you can make this month. I will be posting the other three soon.
Click on my calendar to check out the dates of the upcoming classes. Register soon, space is limited.

All supplies Stampin' Up!
Stamp set: Bring on the Cake
Ink: Black StazOn, Cherry Cobbler classic
Paper: Basic Black, Very Vanilla, Cherry Cobbler card stock and Newsprint Designer Series Paper.
Accessories: 1 1/4" Black striped grosgrain ribbon, Pewter Build A Brad, Paper Piercer, Mat Pack, 1/2" circle punch, Aqua Painter

Tuesday, January 25, 2011

Sale-a-bration starts today!!!
click here to start shopping

Monday, January 24, 2011

Lots of Love Letterpress

I finally got out my Letterpress Plate and played with it, but as you can see once I started I could not stop. I used the craft spots as Stampin' Up! suggested, but at my class on Saturday we tried it with the Stampin' Write Markers and it worked great! My scans do not show it well on the first two cards, but it you look at card three, the embossed images are very deep. I think that next time I will add a shim. If you have any questions about our letterpress plates you can contact me or watch this utube video. You cannot hear Shannon talk, but you can watch her use the plates. We also have a plate covered with lots of little hearts. You can purchase both plates here. I'm sure you will enjoy them as much as I have.

All supplies Stampin' Up:

Card #1
Stamps: Thoughts and Prayers
Ink: Early Espresso craft spot and classic pad, Early Espresso, Soft Suede and Regal Rose Stampin' Write Markers
Paper: Early Espresso, Regal Rose and Whisper White card stock
Accessories: Big Shot, Letterpress plate, Heart to Heart punch, Stampin' Dimensionals, Stampin' Sponge and Early Espresso 1/4" grosgrain ribbon

Card #2
Stamps: None
Ink: Regal Rose Craft spot, Soft Suede and Regal Rose Stampin' Write markers
Paper: Early Espresso and Regal Rose card stock, Watercolor Paper
Accessories: Shot, Letterpress plate,  Early Espresso 5/8" Satin ribbon

Card #3

Stamps: Valentine Defined
Ink:  Craft spot, classic pad and Stampin' Write Marker all in Early Espresso
Paper: Early Espresso, Regal Rose and Whisper White card stock
Accessories: Big Shot, Letterpress plate, Square Lattice Textured Impressions, Heart to Heart punch, Stampin' Dimensionals, Stampin; Sponge and Early Espresso 1/4" grosgrain ribbon

Happy Stampin'

Thursday, January 20, 2011

Glimmer Valentine Defined

Here is a fun quick Valentine card using the Red Glimmer paper available in the Occasions Mini Catalog. Stampin' Up! has a great punch that punches all three hearts on card at one time. We will be making this card at my January stamp camp. Inspiration for this card came from this card. I added the sentiment, black mat and changed the ribbon to black and place on the left hand side.

All Supplies Stampin' Up!
Stamps: Valentine Defined
Ink: Real Red craft, Basic Black and Real Red Stampin' Write Markers
Paper: Real Red, Basic Black and Whisper White card stock, Red Glimmer paper
Accessories: Stampin' Dimensionals, Basic Black 5/8" Satin Ribbon, Heart to Heart punch.

Thanks for looking.

Friday, January 14, 2011

Petal Cone Bigz die Valentine heart pocket
I finally got this posted. I had taken a picture with my camera, but everytime I tried to post the picture blogger kept pulling it in sideways. We tried everything. Finally today, I thought, why don't I just scan it, and that worked. So anyway...

This is one the the projects for this months stamp camp. This is the new Petal Cone die (in the Occasions Mini catalog) that makes a four sided cone. It also die cuts the banner used. I just cut two, instead of four pieces to make this heart pocket. So easy and so much fun. Brenda Keenan, a fellow Stampin' Up! demonstrator posted one similar (I made a few changes) on Stampin' Connection, an idea gallery for demonstrators only. Join my team and you can see all the beautiful creations made my Stampin' Up! demonstrators all over the world, and even post your own projects. I have it shown in two different papers, from the Love Impressions Designer paper pack offered in the Occasions Mini Catalog. I got the Iridescent decorative shredding and heart suckers from the Dollar Tree.
If you live in or will be visiting the Charleston, South Carolina area, contact me to make a reservation to attend this camp.

All supplies Stampin' Up! unless noted.

Stamps:  Love you much
Ink: Black StazOn ink pad, Real Red Watercolor Crayon
Paper: Love Impressions Designer Series Paper, Real Red and Whisper White cardstock
Accessories: Big Shot Die cutting machine, Petal Cone Bigz die, 1/8" Real Red Taffeta Ribbon, 1 3/4" Scallop circle, and small heart punches, Aqua Painter, Crop-a-dile, Stampin' Dimensionals, decorative shredding and candy not Stampin' Up!


Wednesday, January 5, 2011

Valentine Defined Valentines Day Stamp camp project
Happy New Year! I pray you had a wonderful holiday season. I am sorry I haven't posted in so long, but I had health issues most of the month of December. Praise God this is a new year, and I am feeling so much better!

Here is one of the projects for my January Stamp. This is a fun card to make. I wish I could say it was my creation, but I cased the sketch from Ahelynck on Splitcoast stampers. If you are a member you can view the card here. I did make several changes. I changed the colors, left off the punched edge, changed the ribbon to the new pom pom trim. I did not put the Rhinestones on my butterflies and moved the sentiment to the bottom of the card (also changed the punch used) I left off one stamped image, leaving just the tree and sentiment. Thank you Ahelynck for the great card sketch. I love the tree with the hills and the Scallop Circle in the background.

All supplies Stampin' Up!
Stamps: Valentine Defined
Ink: Pear Pizzazz and Melon Mambo classic
Stampin' Write Markers: Pear Pizzazz, Melon Mambo and Early Espresso
Paper: Whisper White, Melon Mambo and Tempting Turquoise card stock. In Color Designer Series Paper (Pear Pizzazz) and Bold Brights Designer Series Paper (Melon Mambo)
Accessories: Big Shot die cut machine, Scallop Circle Bigz Die, Beautiful Wings embosslits die, Framed Tulips Textured Impression embossing folders, Melon Mambo Pom Pom trim, Tombo Multi Liquid glue, Curley Label punch, Stampin' Sponges